


Oh, the fun you can have in a tiny room with 3 kids all day.... wait...
Well, after looking into the apartments they had for us I found out that they accepted animals and from most of the reviews it sounded like there are a ton of animals there. Well I panicked a little because my oldest has animal allergies, especially to cats, and those allergies induce asthma attacks.
Bad ones.
I called the housing department at my hubby's work and they were so sweet and understanding and took it upon themselves to find us a new place on almost no notice! We get to move in on Saturday and I get to kiss this extended stay goodbye. Now that is exciting!
In my kitchen at The Starter Home I have an awkward empty space right next to the fridge. I have always wondered why they didn't just put more cabinets there...
Well I decided to build a mail storage/book shelf thing for that wall so increase my storage space and make use of all that empty space.
My husband built the bookcase using mdf, 2x2's, 1x2's and moulding.

Because the main part of this was made from MDF I knew I would have to paint it but I wasn't really sold on a color or even how it would look once it was all done. After scourging the internet I fell in love with zinc wrapped furniture. Zinc furniture is all over the place in super gorgeous/expensive designs right now. I mean just take a look at this piece from Restoration Hardware. I mean it is only a measly $795. Pocket change....right...?
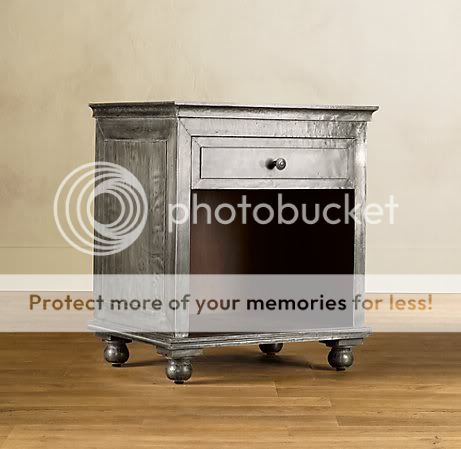 | |
| www.restorationhardware.com |
I loved the idea of adding another layer to my kitchen. I had painted wood cabinets, stained wood furniture so I thought a metallic piece would be a great addition but the real questions was how in the world could I create it? I thought about just painting the wood with metallic paint but I was worried that it would look just like that.
Wood painted with metallic paint.
So I decided to get a little creative and pray to the crafting gods that it would all turn out how I wanted.
I used some tinfoil, a ton of mod podge, craft paint (I bought black, cream, gray and brown metallic craft paints) and a foam craft brush.
The very first thing I did was apply the tinfoil. I planned out where I wanted seams and started going for it.
Cut your tinfoil to fit the area you will cover and then use your craft brush to apply a thin layer of mod podge to the wood.

Smooth your tinfoil over the wood being careful to not wrinkle it too much.

Keep up this process until you have completely covered your item. When my hubby walked in at this point you could tell that he hated it but wasn't sure how I felt about it. He sat there quietly starring and not wanting to hurt my feelings.
I let him struggle for a minute before I told him I wasn't done. Big Huge Sigh of Relief!

Do you see that large container of mod podge! Seriously love that stuff.
Next I used small nails to create the look that the metal was wrapped around the furniture. I used pictures from Restoration Hardware to choose where to place them. Then I started the faux finishing.
I was going to use a glazing medium to create the the faux zinc look but then I decided to use the flat finish mod podge. Not only would it create a protective finish but since it drys clear it would work similar to a glaze.
I poured a bunch of mod podge on a plate and added my colors.
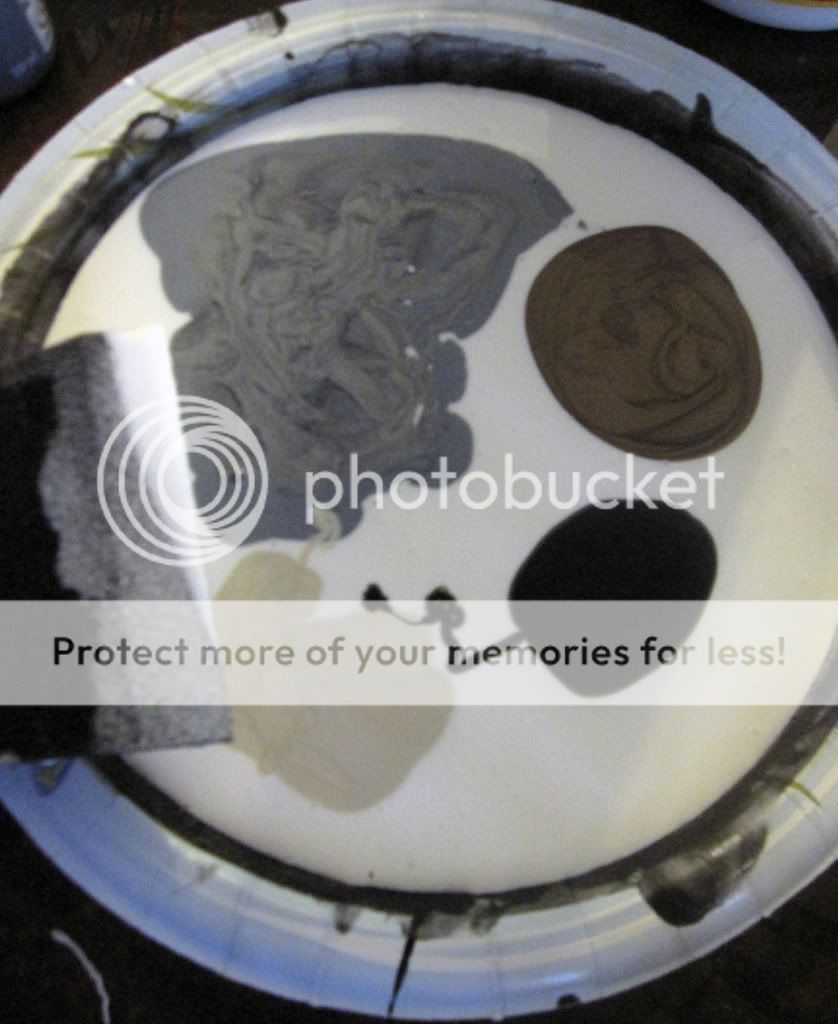
I used mostly the grey metallic color and just added spots of the black, brown and cream. Next I mixed the colors until they were kind of swirly.
Like this.
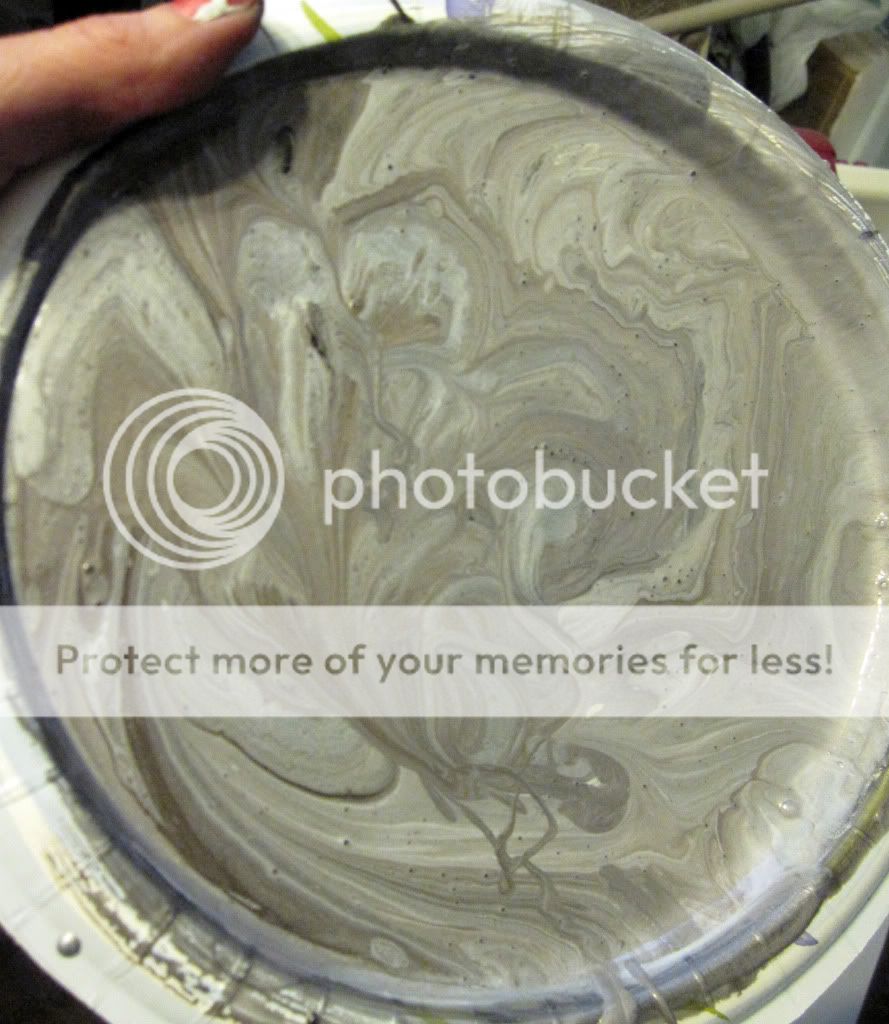
You don't want to mix it too much because you want there to be variation in the color. I just painted on a layer letting the colors go where they wanted and not trying to be too perfect with it. This was while it was still wet.

Do you see how it is kind of streaky and varied? Let that layer dry and keep layering. I think I ended up with four coats of different mixtures.
This was the side after the first layer had dried. It still looked a little tinfoily.

Now the sides were a little plain so I added metal straps to them. I cut out strips of cardboard and, using mod podge, I covered them in tinfoil.


I attached the strips to the sides of my bookcase with nails and used my mod podge/paint mix to faux finish them.

I let everything dry thoroughly and then topped it with two coats of satin finish poly-acrylic.

Here is just one side. I decided not to finish the inside of it with the zinc finish so I will show you in the next post how I chose to finish the inside and I will also have the final after pictures!
Thanks to all you who come, read and share your thoughts on the happenings at The Starter Home and hopefully the next time I am posting it will be from an apartment and not a hotel :)
This is amazing! I am picky about faux finishes, but this one more than passes the test! Nice job!
ReplyDelete-Natalie, WA
Wow what an amazing finish - it looks fantastic!! Thanks for sharing the how to - I'm gonna give this a try! I'm your newest follower :)
ReplyDeleteVery cool technique! I'm going to have to try this one!!!
ReplyDeleteI have been using tin foil to create faux embossed metal. I just did a tutorial this week for a mother's day charm...I have also done tiles but I don't think I have ever thought of using it for furniture...hmmm.? Thanks so much for the inspiration...xo
ReplyDeleteLucy